
December 24, 2024
Wellness Tips
Listen to THIS ARTICLE:
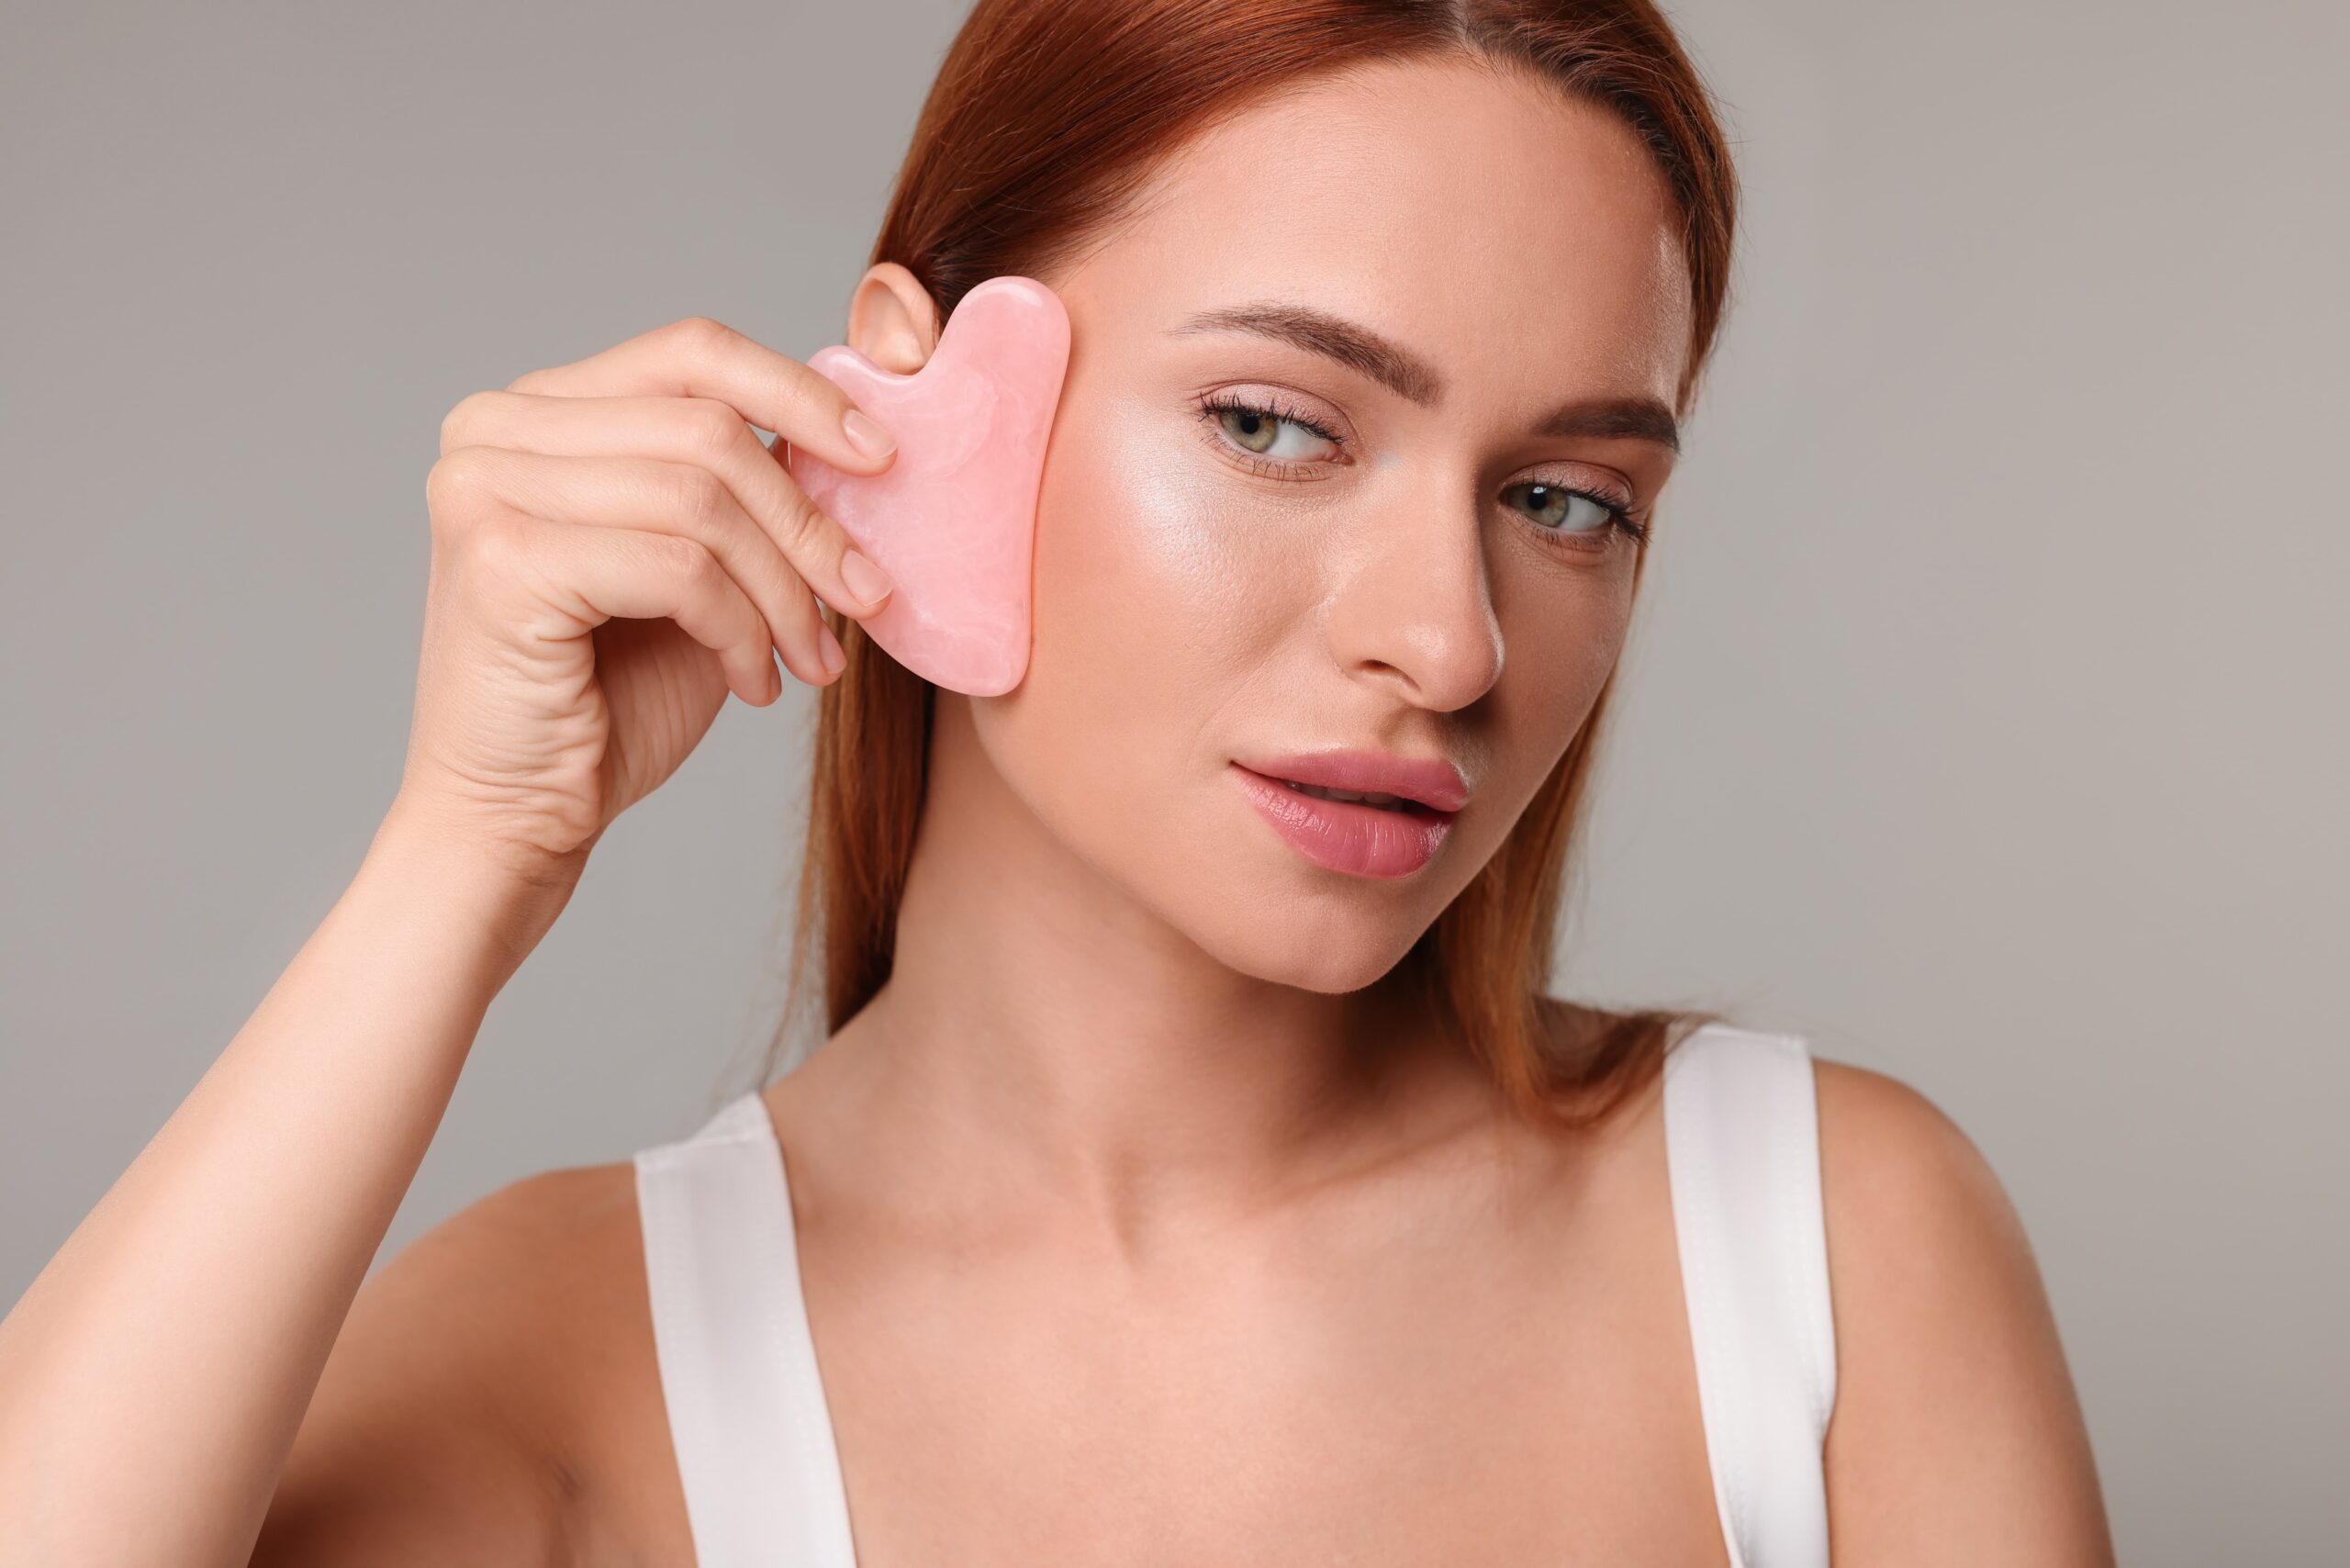
Gua Sha facial mapping is the practice of targeting specific areas of the face for different skin and wellness benefits. This guide walks through the key zones, what each one does, and how to use your Gua Sha tool on each area for the best results.
Most people who start using Gua Sha do the same thing. They pick up the tool, apply some oil, and start gliding it across their face without much thought about where they are focusing or why. And while that approach will still feel nice, it leaves a lot on the table. Gua Sha facial mapping is the idea that different areas of your face respond to different techniques, pressures, and directions. When you know what each zone needs, your sessions go from pleasant to genuinely effective.
This is not about complicated routines or memorizing a medical chart. It is about understanding the basic zones of your face and what happens when you give each one the right kind of attention. Once you get it, your Gua Sha practice becomes more intentional, more targeted, and a lot more rewarding.
What Gua Sha Facial Mapping Actually Means
Facial mapping has roots in Traditional Chinese Medicine, where different areas of the face are thought to correspond to different systems in the body. While the modern skincare approach does not require you to subscribe to that entire framework, the practical takeaway is valuable: different parts of your face have different needs, and targeting them intentionally produces better results than a one-size-fits-all approach.
The Core Idea Behind Facial Mapping
- Your forehead holds tension differently than your jawline
- The skin under your eyes is far more delicate than the skin on your cheeks
- Lymphatic drainage pathways run in specific directions, and working with them matters
- Some areas benefit from firmer pressure while others need a feather-light touch
- Knowing the direction of your strokes for each zone helps move fluid where it needs to go
Think of it as a map for your Gua Sha practice. Instead of wandering, you have a clear sense of where to go, how to get there, and what to expect when you do.
Forehead and Brow: Releasing Tension and Smoothing the Skin
The forehead is one of the most common places people carry tension without realizing it. Frowning, squinting, concentrating at a screen for hours. All of that tightness shows up in the muscles across your forehead and between your brows. Over time, it contributes to fine lines and a tired, heavy feeling in that area.
How to Work This Zone
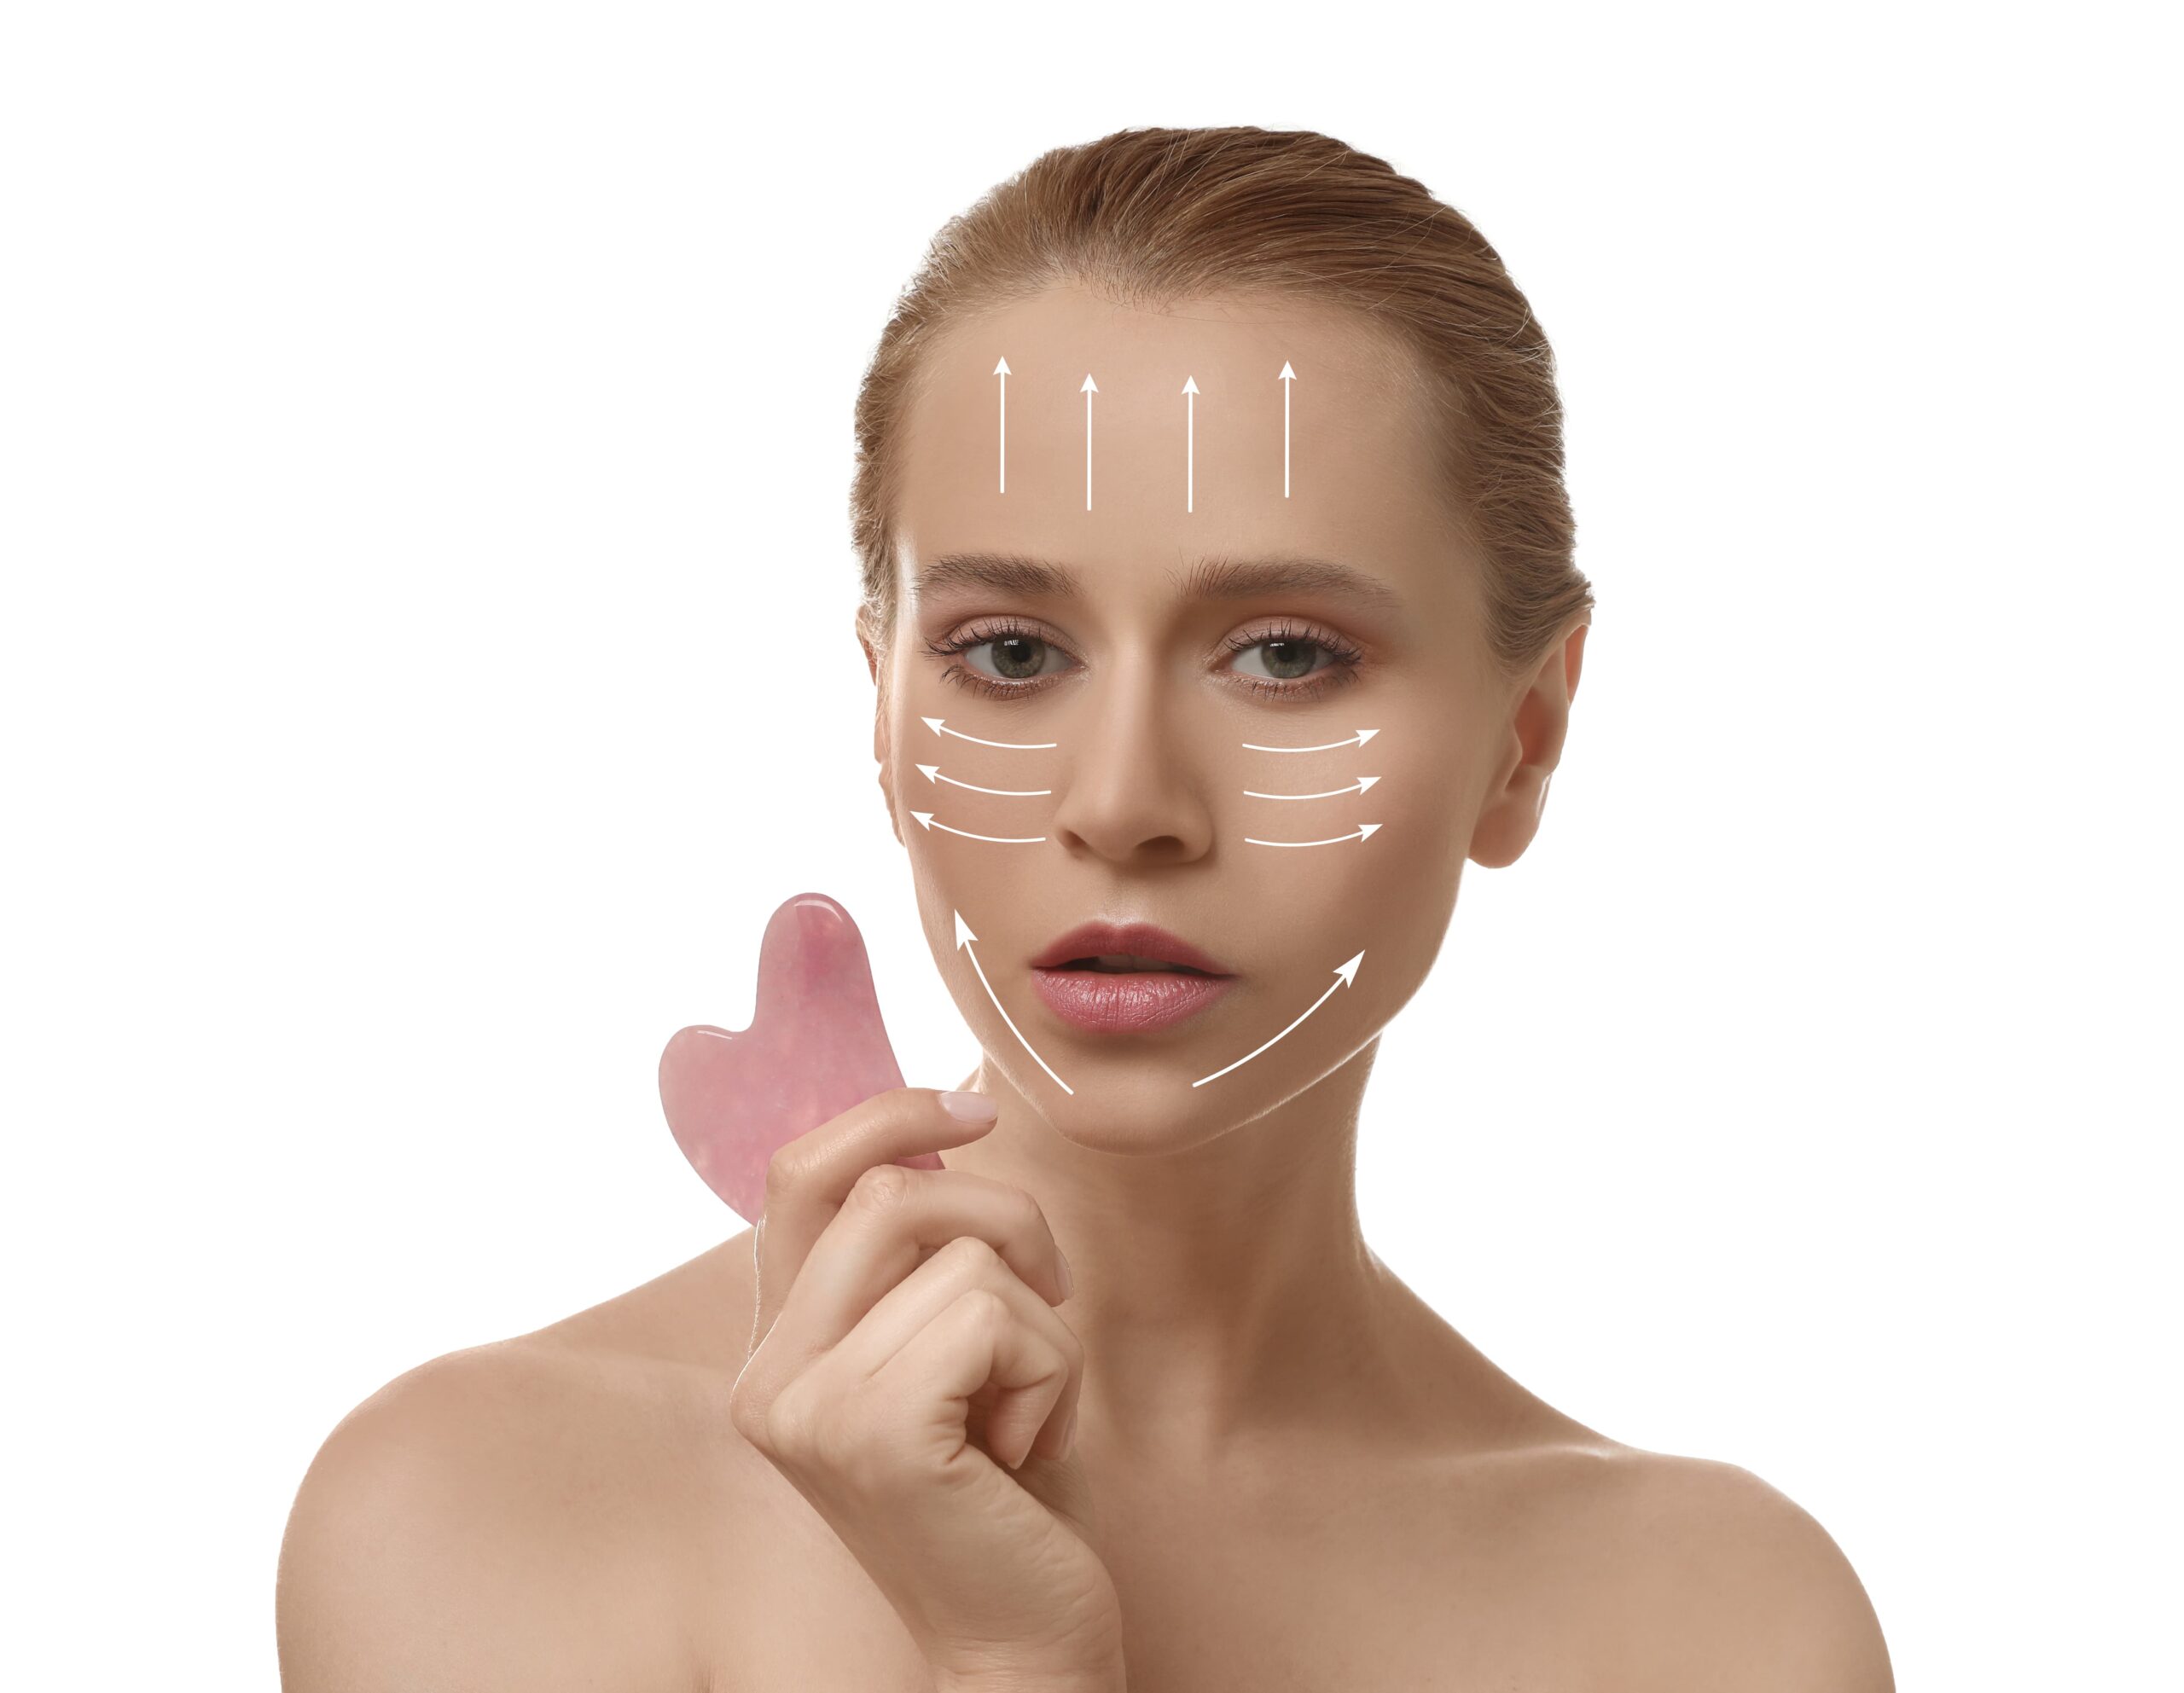
- Use upward and outward strokes from the center of the forehead toward the temples
- Apply moderate pressure, enough to feel the tool working but not enough to cause discomfort
- Spend extra time between the brows where tension tends to concentrate
- Finish with gentle sweeping strokes from the temples down toward the ears to encourage drainage
Many people notice that their forehead feels lighter and more relaxed after even a few minutes of focused Gua Sha in this zone. It is one of the areas where the tension-relief benefit is most immediately noticeable.
Cheeks and Jawline: Sculpting, De-Puffing, and Releasing Tightness
The cheeks and jawline are where Gua Sha facial mapping really shines. These areas hold a lot of fluid, especially in the morning, and the jawline is a common spot for tension, particularly if you clench your teeth or hold stress in your jaw. Working these zones with intention can make a visible difference in how sculpted and defined your face looks.
Cheeks: Technique and Direction
- Use outward strokes from the nose toward the ears, following the natural contour of your cheekbones
- Moderate pressure works well here since the cheeks can handle more than the delicate under-eye area
- Focus on the area just beneath the cheekbones where puffiness and fluid tend to collect
- Consistent practice in this zone is what many clients describe as giving their face a more lifted, defined appearance over time
Jawline: Technique and Direction
- Use sweeping strokes from the chin along the jawline toward the ear
- Apply slightly firmer pressure here, especially if you carry jaw tension or clench at night
- Spend extra time on the masseter muscle, the thick muscle at the back of the jaw that tightens from clenching
- Finish by sweeping down the side of the neck to guide fluid toward the lymph nodes
The jawline is where a lot of people feel the most dramatic difference. A 2023 review published in the Journal of Cosmetic Dermatology examined whether tools like Gua Sha and jade rollers offer real benefits within dermatology, supporting the idea that targeted facial massage techniques can have meaningful effects on the skin.
Under-Eyes and Neck: Draining Fluid and Supporting Overall Flow
The under-eye area and the neck are two zones that require a completely different approach than the rest of your face. The skin under your eyes is the thinnest and most delicate skin on your entire face. And the neck is where all the lymphatic drainage from your facial Gua Sha ultimately needs to go. Getting both of these right makes the entire practice more effective.
Under-Eyes: Technique and Direction
- Use feather-light pressure only. This area bruises easily and does not need heavy work.
- Gentle strokes from the inner corner of the eye outward toward the temple
- Keep the tool almost flat against the skin to distribute pressure evenly
- This zone is best for reducing morning puffiness and helping fluid drain away from the eye area
- A cool Gua Sha tool (stored in the fridge) feels especially soothing here
Neck: The Foundation of Your Entire Routine
Here is something most people skip and it matters more than they think. The neck is where your lymphatic drainage pathways empty. If you do not open up the neck first, the fluid you are moving from your forehead, cheeks, and jawline has nowhere to go. Many professional Gua Sha therapists start with the neck before touching the face for exactly this reason.
- Start your session with long, downward strokes on both sides of the neck
- Use gentle to moderate pressure, stroking from just below the ear down toward the collarbone
- Repeat 5 to 10 times on each side before moving to the face
- After finishing your full facial routine, return to the neck with a few final downward strokes to close the session
This simple step of opening the neck first and closing it at the end can make a noticeable difference in how de-puffed and defined your face looks after a session.
Why Facial Mapping Matters for Your Gua Sha Routine
Gua Sha facial mapping is not about perfection or following a rigid protocol. It is about being intentional with your practice instead of going through the motions. When you understand what each zone of your face needs and how to work it properly, everything changes. Your sessions become more effective. The results become more visible. And the experience itself becomes more meditative because you are present and purposeful with every stroke.
What Changes When You Map Your Routine
- You spend the right amount of time on each area instead of over-working some and neglecting others
- You use the right pressure for each zone, protecting delicate areas and working deeper where it is safe
- You move fluid in the right direction, supporting lymphatic drainage rather than pushing it the wrong way
- Your results compound faster because every session is working with your face’s natural structure
- The practice becomes a ritual you look forward to rather than a rushed step in your skincare routine
Whether you are doing Gua Sha at home or coming in for a professional session, understanding facial mapping gives you a foundation that makes every session count.
Experience Professional Gua Sha at Empower Wellness Spa
At Empower Wellness Spa, our trained therapists use targeted facial mapping techniques to tailor every Gua Sha session to your skin’s unique needs. Whether you want to focus on de-puffing, tension relief, or overall glow, every session is designed to help you look and feel your best.
Frequently Asked Questions
Gua Sha facial mapping is the practice of targeting specific zones of the face with different techniques, pressures, and stroke directions based on what each area needs. It draws from Traditional Chinese Medicine principles and helps make your Gua Sha sessions more intentional and effective by working with the natural structure of your face and lymphatic drainage pathways.
Start with your neck. Using long, gentle downward strokes on both sides of the neck opens up the lymphatic drainage pathways so the fluid you move from your face has somewhere to go. After the neck, move to the forehead, then cheeks, jawline, and under-eyes. Finish by returning to the neck with a few closing strokes to complete the drainage.
The general rule is to stroke outward and upward on the face. Forehead strokes go from the center outward toward the temples. Cheek strokes go from the nose toward the ears. Jawline strokes go from the chin toward the ears. Under-eye strokes go gently from the inner corner outward. Neck strokes always go downward toward the collarbone. Working in these directions supports natural lymphatic flow.
Pressure varies by zone. The under-eye area needs feather-light pressure since the skin is very delicate. Cheeks and forehead can handle moderate pressure. The jawline, especially the masseter muscle, can tolerate slightly firmer pressure if you carry tension there. The neck should be gentle to moderate. If any area feels uncomfortable or stays red for more than 30 minutes, lighten your pressure.
Yes, many people find that targeted Gua Sha along the jawline helps release tension, especially in the masseter muscle which tightens from clenching or grinding. Using sweeping strokes from the chin toward the ear with slightly firmer pressure can help relax this area. Consistent practice is key, as jaw tension tends to build up over time and benefits from regular attention.
de-puffing, facial gua sha, facial mapping, gua sha, gua sha technique, jawline tension, lymphatic drainage, skincare routine